In the ever-expanding and ever-changing world of consumer technology,
less is more, meaning that achieving certain end-results by exerting
less effort is definitely something that appeals to users. We are
beginning to see this way of thinking make its way into our gadgets
through the use of quick and simple gestures, apps and tweaks that
automate certain tasks, as well as the production and development of
software like Apple’s Siri assistant.
For those iDevice loving individuals who don’t have access to one of Apple’s supported Siri or voice dictation compatible devices such as the iPhone 4S or the new 3rd-gen iPad, worry not as Cydia has stepped in once again to act as the knight in the shining armor. Developer rud0lf77 has recently pushed his DictationPad tweak onto the unofficial app store and exists to bring the much loved dictation feature to those non-supported iPads that are running iOS 5 and above.
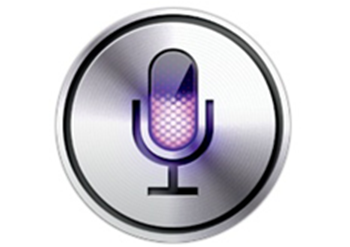
When installed, DictationPad alters the default iPad keyboard and makes itself at home at the left hand side of the spacebar key, manifested through a small little microphone symbol. The included microphone image was obviously been designed and included to mimic the official Apple offering that comes bundled with supported newer generation devices. After installation, the DictationPad tweak requires no further user configuration, meaning that no additional preferences bundles are created and no home screen icons are added. The only change to the actual physical appearance of iOS is the added dictation symbol on the spacebar key.
 Tapping on the newly added symbol when the keyboard is visible on the
screen will invoke the dictation features, turning the status bar red
in color. Obviously the whole point of dictation is to allow the system
to turn spoken words into on-screen text, so when the status bar turns
red, you can take that as your cue to chat away to the iPad. Tapping the
microphone for the second time will end the current dictation session
and process any spoken words it has received before displaying it
on-screen in the relevant field.
Tapping on the newly added symbol when the keyboard is visible on the
screen will invoke the dictation features, turning the status bar red
in color. Obviously the whole point of dictation is to allow the system
to turn spoken words into on-screen text, so when the status bar turns
red, you can take that as your cue to chat away to the iPad. Tapping the
microphone for the second time will end the current dictation session
and process any spoken words it has received before displaying it
on-screen in the relevant field.
Although voice dictation is a popular feature on mobile devices, it is worth keeping in mind that all of the processing is done via an internet connection. DictationPad needs an active Wi-Fi or cellular data connection to be able to do its backend processing. The tweak is available from the ModMyi repository as a free of charge download and requires a jailbroken iPad on iOS 5 or above with Siri capabilities.
For those iDevice loving individuals who don’t have access to one of Apple’s supported Siri or voice dictation compatible devices such as the iPhone 4S or the new 3rd-gen iPad, worry not as Cydia has stepped in once again to act as the knight in the shining armor. Developer rud0lf77 has recently pushed his DictationPad tweak onto the unofficial app store and exists to bring the much loved dictation feature to those non-supported iPads that are running iOS 5 and above.
When installed, DictationPad alters the default iPad keyboard and makes itself at home at the left hand side of the spacebar key, manifested through a small little microphone symbol. The included microphone image was obviously been designed and included to mimic the official Apple offering that comes bundled with supported newer generation devices. After installation, the DictationPad tweak requires no further user configuration, meaning that no additional preferences bundles are created and no home screen icons are added. The only change to the actual physical appearance of iOS is the added dictation symbol on the spacebar key.
Although voice dictation is a popular feature on mobile devices, it is worth keeping in mind that all of the processing is done via an internet connection. DictationPad needs an active Wi-Fi or cellular data connection to be able to do its backend processing. The tweak is available from the ModMyi repository as a free of charge download and requires a jailbroken iPad on iOS 5 or above with Siri capabilities.